WordPress Chatbot with N8N, Make and Zapier Integration
Why Your WordPress Chatbot Needs Webhook Automation
Most chatbots just answer questions. That’s fine for FAQs. But what if your chatbot could actually do things?
Book appointments. Capture leads. Request quotes. Check availability in real-time.
That’s where webhook automation comes in. Your WordPress chatbot triggers an external workflow, and platforms like n8n, Zapier, or Make handle the heavy lifting. The best part? The automation can send data back to your chatbot for dynamic responses.
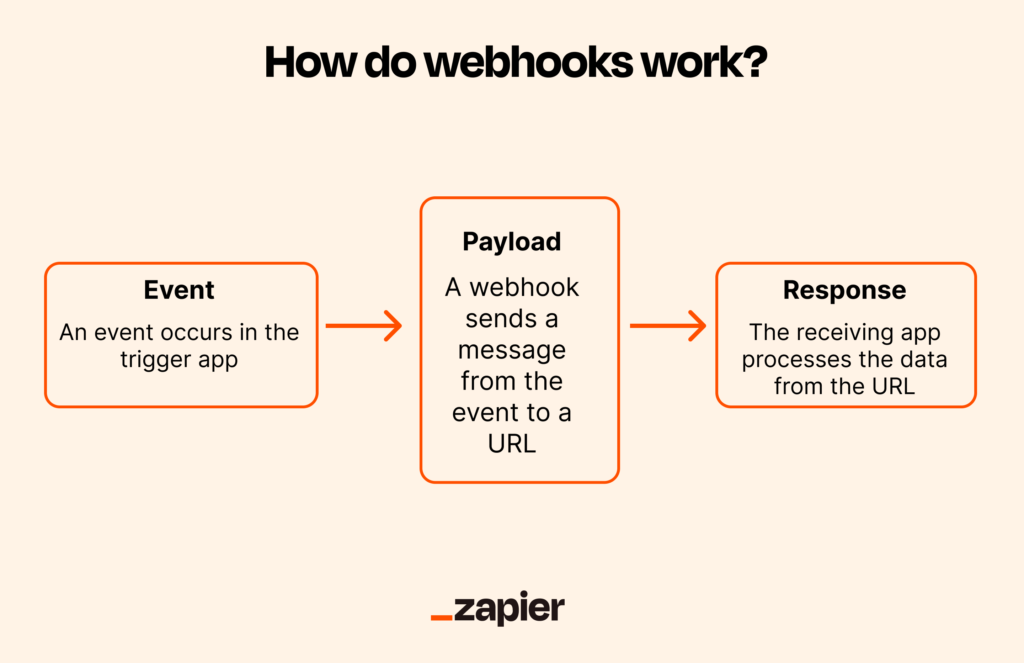
How AI Chatbot Webhook Automation Works
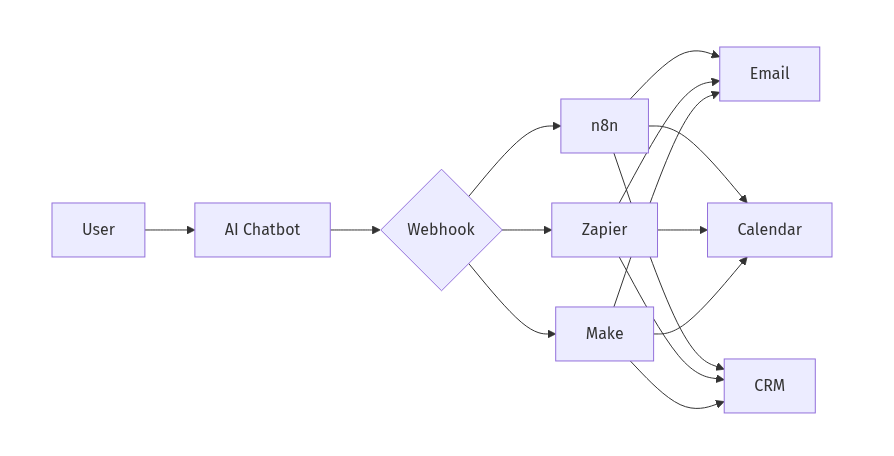
Here’s the flow:
- User tells the chatbot what they want (“I need a quote for wedding photography”)
- AI recognizes the intent and collects required details through conversation
- AI asks for confirmation before submitting
- Webhook fires to n8n, Zapier, or Make with structured JSON data
- External system processes the request (creates CRM entry, sends email, checks calendar)
- External system returns data to the chatbot (available slots, price quote)
- AI presents the result in natural language
No rigid forms. No multi-step popups. Just conversation.
What Makes AI Chat Search Pro Different
Other WordPress chatbots require 3+ separate tools to achieve this: a chatbot plugin, a webhook middleware plugin, and an automation platform. Some require building chatbot logic externally in n8n first.
AI Chat Search Pro handles everything in one native WordPress plugin:
- AI-driven data collection: The chatbot asks for required fields naturally, not through rigid form fields
- Bi-directional data flow: External systems can return up to 5KB of data the AI uses in its response
- HMAC-SHA256 signed webhooks: Every request is cryptographically signed for verification
- Admin-defined actions: You control which actions are available. The AI can’t hallucinate webhooks
- Rate limiting: 5 webhook triggers per IP per hour prevents abuse
- One-time payment: No monthly SaaS fees like ChatBot.com ($624/year)
If you’re new to AI chatbots, start with our ChatGPT and Gemini setup guide first.
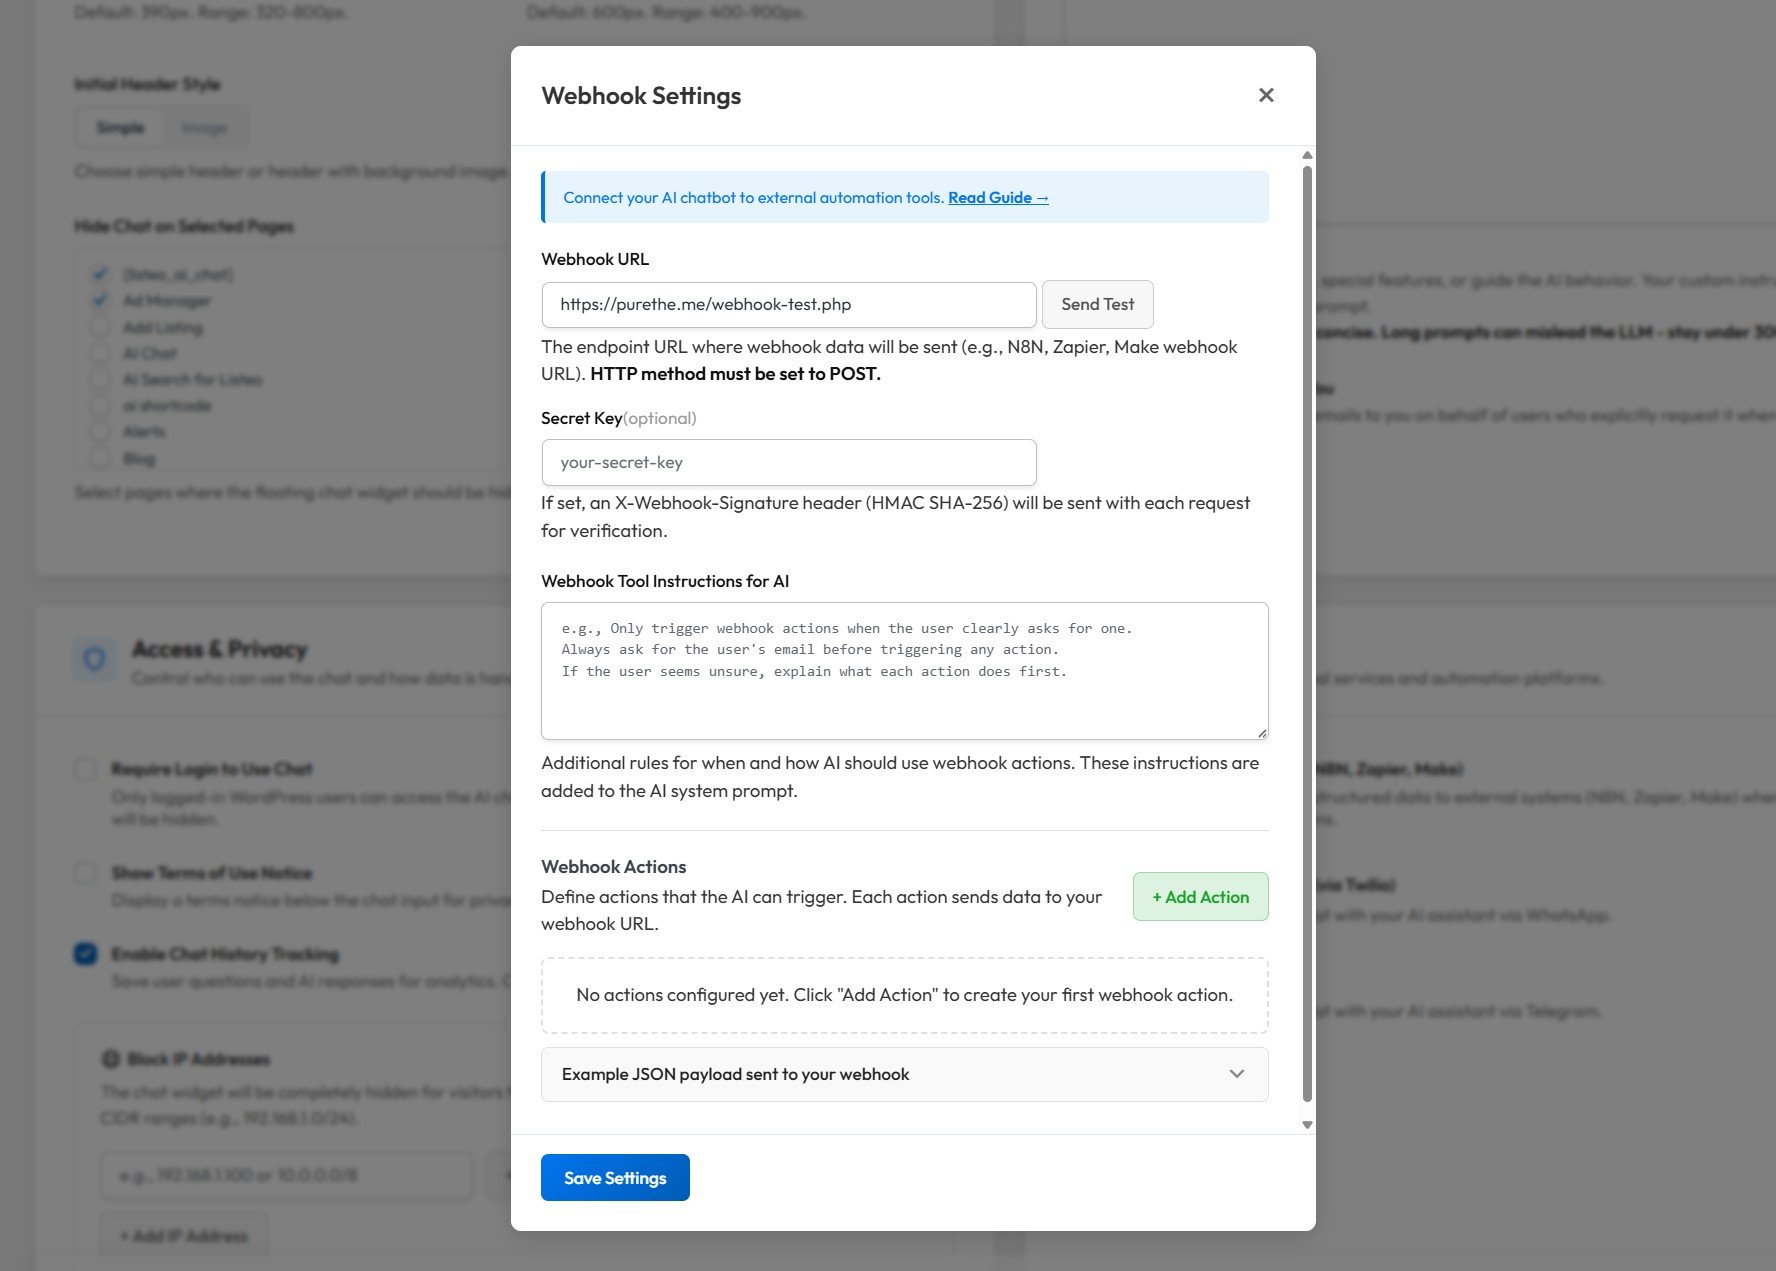
Webhook can be added in AI Chat → Integrations →Webhook Automation (e.g. N8N, Zapier, Make) → Configure
Then under “Webhook actions” add actions you have on N8N or Zapier
Sample use case from one of our customers
Customer handles order cancellation logic via n8n in a WooCommerce store. The AI sends structured data to the n8n server, where the ‘magic’ happens.

n8n vs Zapier vs Make: Which Platform Should You Choose?
All three work with AI Chat Search Pro. Here’s when to use each:
| Platform | Best For | Pricing | Learning Curve |
|---|---|---|---|
| n8n | Privacy-focused sites, developers, self-hosters | Free (self-hosted) or from $24/mo (cloud) | Medium |
| Zapier | Non-technical users, quick setup, largest app ecosystem | Free tier, then $19.99/mo (billed annually) | Easy |
| Make | Visual workflow builders, complex data transformations | Free tier, then $9/mo (billed annually) | Medium |
Setting Up Webhook Actions in AI Chat Search Pro
Before connecting to any automation platform, you need to configure your webhook actions in the plugin.
Go to AI Chat → Integrations → Webhook Automation → Configure. Here you can:
- Paste your webhook URL (from n8n, Zapier, or Make)
- Set your webhook secret for HMAC verification
- Define actions the AI can trigger
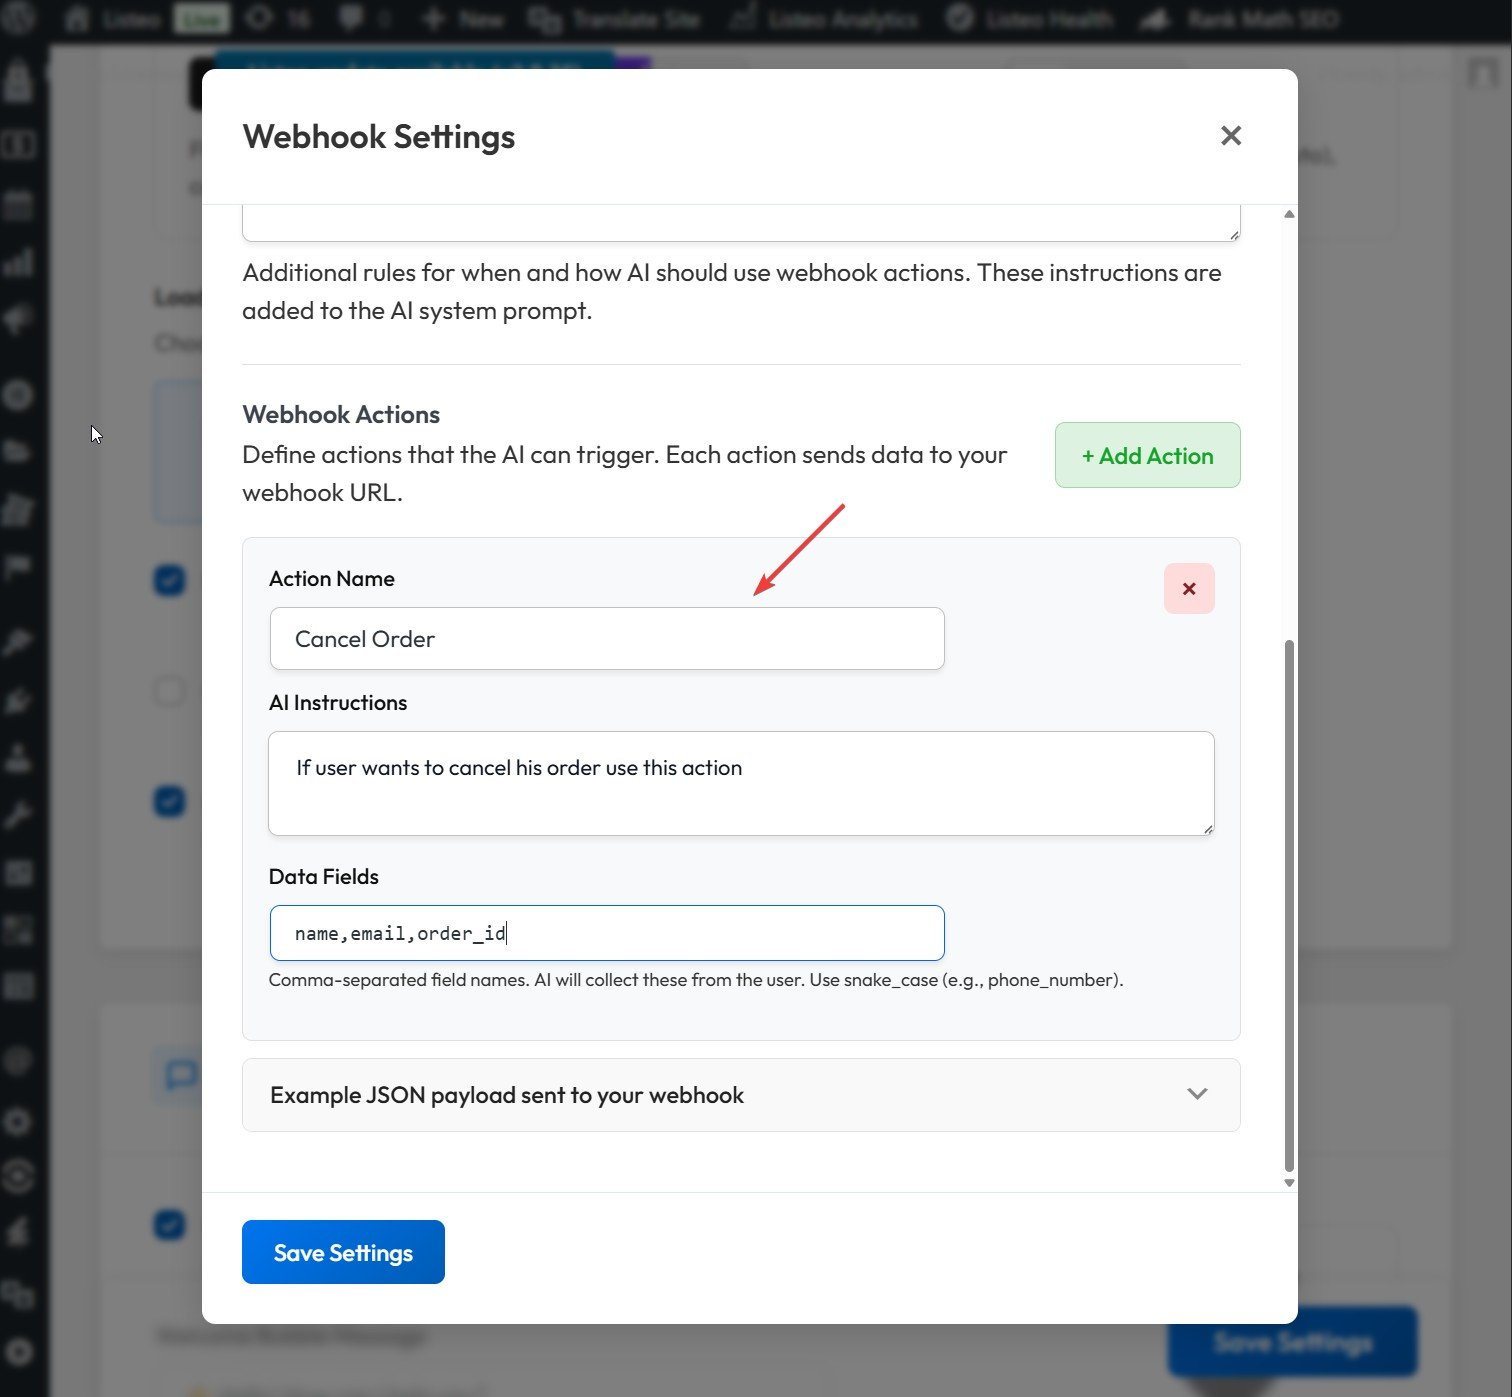
Each action has three fields:
- Action Name – a label like “Cancel Order” or “Book Appointment”
- AI Instructions – tells the AI when to use this action (e.g., “If user wants to cancel his order use this action”)
- Data Fields – comma-separated field names the AI will collect from the user (e.g.,
name,email,order_id)
You can add as many actions as you need with the + Add Action button. The AI will route to the correct action based on user intent.
Example JSON payload sent to your webhook
{
  "action": "cancel_order",
  "action_label": "Cancel Order",
  "timestamp": "2025-01-15T14:30:00+00:00",
  "site_url": "https://yoursite.com",
  "test": false,
  "data": {
    "name": "John Doe",
    "email": "john@example.com",
    "order_number": "12345",
    "reason": "Changed my mind",
    "current_page": "https://yoursite.com/contact",
    "user_id": 42,
    "conversation_id": "abc123-def456"
  }
}
The data object contains the fields you defined plus auto-captured context. The “Send Test” button sends a payload with "test": true so you can distinguish test requests in your workflow.
n8n WordPress Chatbot Workflow Setup
Why n8n? Self-hosted means no per-execution fees. Your data stays on your servers.
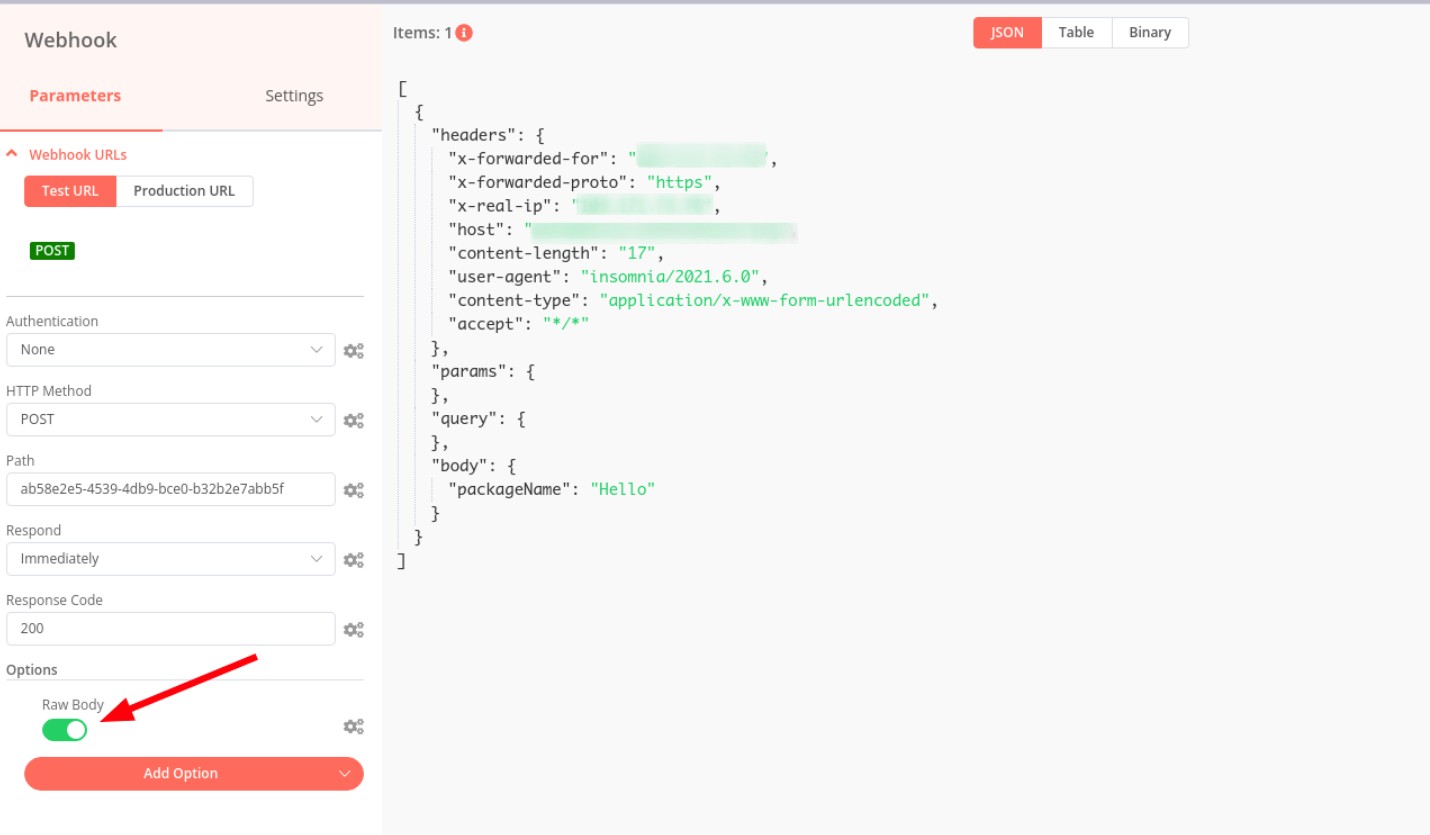
Step 1
Add a Webhook node as your trigger. Set the HTTP Method to POST. Copy the Production URL. In the Webhook node settings, enable the Raw Body option (you will need this for signature verification).
Step 2
Add a Code node to verify the HMAC-SHA256 signature:
const crypto = require('crypto');
const signature = $input.first().json.headers['x-webhook-signature'];
const rawBody = $input.first().json.rawBody;
const expected = 'sha256=' + crypto
  .createHmac('sha256', 'your-secret')
  .update(rawBody)
  .digest('hex');
if (signature !== expected) throw new Error('Invalid signature');
return $input.all();
Replace 'your-secret' with the webhook secret you set in AI Chat Search Pro settings.
Step 3
Add a Switch node that routes based on the action field. This lets you handle different chatbot actions (like quote requests, bookings, or availability checks) with separate branches.
Step 4
Each branch can send emails, update Google Sheets, or create CRM entries. Use the Respond to Webhook node at the end of each branch to send data back to the chatbot.
How to Connect WordPress Chatbot to Zapier
Why Zapier? Easiest setup. No technical knowledge required.
Step 1
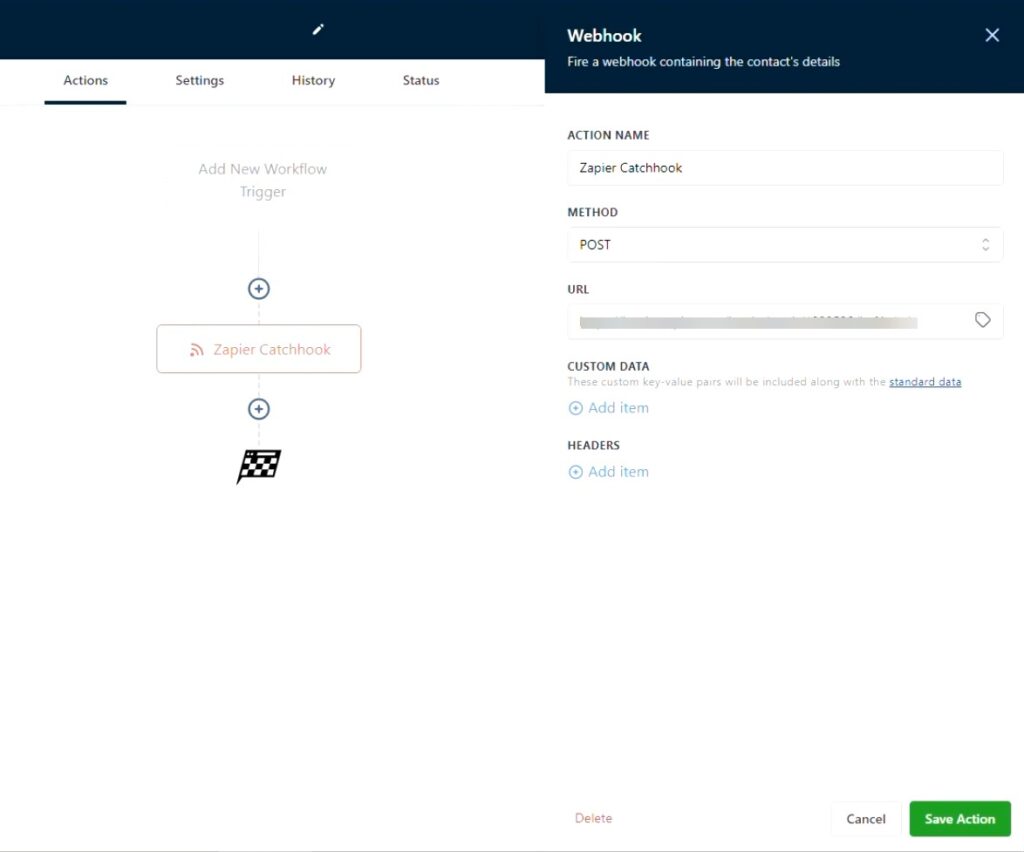
Create a new Zap. Choose “Webhooks by Zapier” as the trigger app and select “Catch Hook” as the trigger event. Zapier will generate a unique webhook URL. Copy it.
Step 2
Go to your AI Chat Search Pro settings. Paste the webhook URL. Set a webhook secret and define your actions with required fields.
Step 3
In Zapier, click “Test trigger” so Zapier starts listening for incoming data. Then go back to AI Chat Search Pro and click the Test Webhook button. Zapier should catch the test payload and show you the mapped fields. If nothing shows up, make sure Zapier was listening before you sent the test.
Step 4
Add Paths after the trigger to route different actions. For example, quote requests can trigger Gmail + Google Sheets, while booking requests trigger Google Calendar + SMS notifications.
Make (Integromat) WordPress Automation
Why Make? Most visual workflow builder. Excellent for complex data transformations.
Step 1
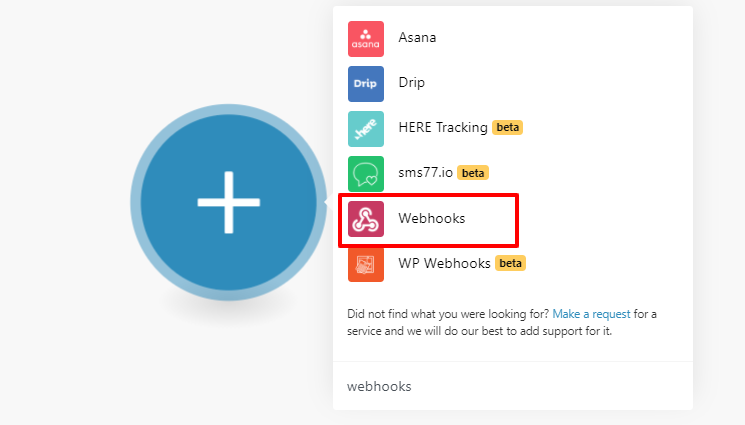
Create a new scenario. Click the + icon and search for Webhooks. Select Custom webhook. Click Add, give it a name, and Make will generate a unique URL. Copy it.
Step 2
Go to your AI Chat Search Pro settings.Paste the webhook URL. Set a webhook secret and define your actions with required fields.
Step 3
Back in Make, click Run once so the scenario starts listening. Then go to AI Chat Search Pro and click the Test Webhook button. Make will catch the payload and automatically determine the data structure. You should see “Successfully determined” in the webhook module.
Step 4
Add a Router module after the webhook to split by action type. Each route handles a different chatbot action (quotes, bookings, availability checks, etc.). You can add a filter on each route to match the action field.
Step 5
Build each route with the modules you need: Email, Google Sheets, HTTP, or CRM modules. To send data back to the chatbot, add a Webhook response module at the end of each route.
Note: Like Zapier, Make’s Custom webhook does not natively support HMAC signature verification. If you need to verify the
X-Webhook-Signatureheader, you can add a filter or a custom function module, but it requires extra configuration. For built-in signature verification, n8n is the simpler choice.
Real-World Use Cases for Chatbot Webhook Automation
Restaurant Booking: “Book a table for 4 this Friday at 7 PM.” AI collects details. Webhook fires to n8n. n8n checks Calendar, returns available slots. AI responds with confirmation.
Quote Requests: “I need a quote for bathroom renovation.” AI asks about scope, timeline, budget. Zapier creates HubSpot contact, notifies sales in Slack, logs to Sheets.
Property Viewings: “I want to see the Oak Street apartment.” AI collects contact info and times. Make checks agent calendar. Returns three available slots. User picks one. Done.
These are what WooCommerce and directory sites are doing right now with AI Chat Search Pro.
Bi-Directional Data: The Feature Competitors Don’t Have
Most chatbot integrations are one-way. Data goes out. Nothing comes back.
AI Chat Search Pro supports bi-directional data flow. Your automation returns JSON data (up to 5KB), and the AI uses it in the response.
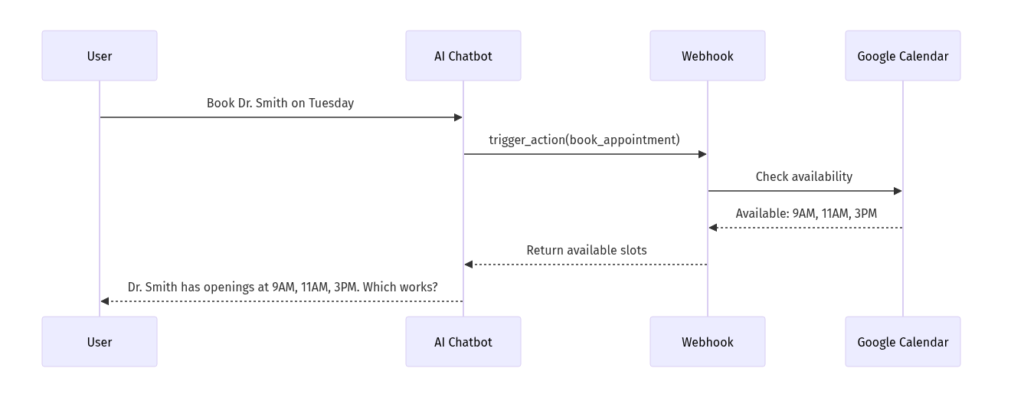
Example: User asks “What times are available for Dr. Smith on Tuesday?”
- Webhook fires with
action: check_availability - n8n queries Google Calendar
- Returns:
{"available_slots": ["9 AM", "11 AM", "3 PM"]} - AI responds: “Dr. Smith has 9 AM, 11 AM, and 3 PM available. Which works?”
No other WordPress chatbot does this natively.
Security: HMAC Signing and Rate Limits
AI Chat Search Pro includes multiple protections:
- HMAC-SHA256 signatures: Every request includes an
X-Webhook-Signatureheader for verification - Rate limiting: 5 webhook triggers per IP per hour stops abuse
- Admin-defined actions: AI can only trigger actions you’ve configured
- Response sanitization: Return data is capped at 5KB, HTML-stripped, depth-limited
For more on how AI chatbots protect your data, read our RAG and vector embeddings explainer.
Quick Setup Checklist
- Install AI Chat Search (free) + AI Chat Search Pro
- Configure your AI provider (OpenAI, Gemini, or Mistral)
- Go to AI Chat Search → AI Chat → Integrations
- Paste your webhook URL from n8n/Zapier/Make
- Set a webhook secret for HMAC verification
- Define your actions: ID, label, description, required fields
- Click Test Webhook to verify
- Build your workflow in the automation platform
- Test the full conversation-to-automation flow
Total setup time: 15-30 minutes.
FAQ
Can I use webhook automation with the free AI Chat Search plugin?
No. Webhook automation is a Pro feature. The free plugin includes the AI chatbot and semantic search, but triggering external workflows requires AI Chat Search Pro.
Which automation platform should I choose?
Choose n8n for self-hosting and no per-execution fees. Choose Zapier for the easiest setup and largest app ecosystem (6,000+ integrations). Choose Make for visual workflow building and complex data transformations.
Is chatbot webhook data secure?
Yes. AI Chat Search Pro signs every webhook request with HMAC-SHA256. Verify the signature in your automation platform to confirm requests came from your WordPress site. Rate limiting (5 per IP/hour) prevents abuse.
Can the chatbot trigger multiple different webhooks?
Yes. You define unlimited actions in AI Chat Search Pro settings. Each action has its own ID, description, and required fields. The AI routes to the correct action based on user intent.
Start Automating Your WordPress Chatbot
Static contact forms are dead. Users expect conversational experiences that do something.
With AI Chat Search Pro, your chatbot becomes an automation trigger. Book appointments. Capture leads. Check availability in real-time. All through natural conversation.
One plugin. One-time payment. No monthly SaaS fees. WordPress-native automation that works with n8n, Zapier, and Make out of the box.